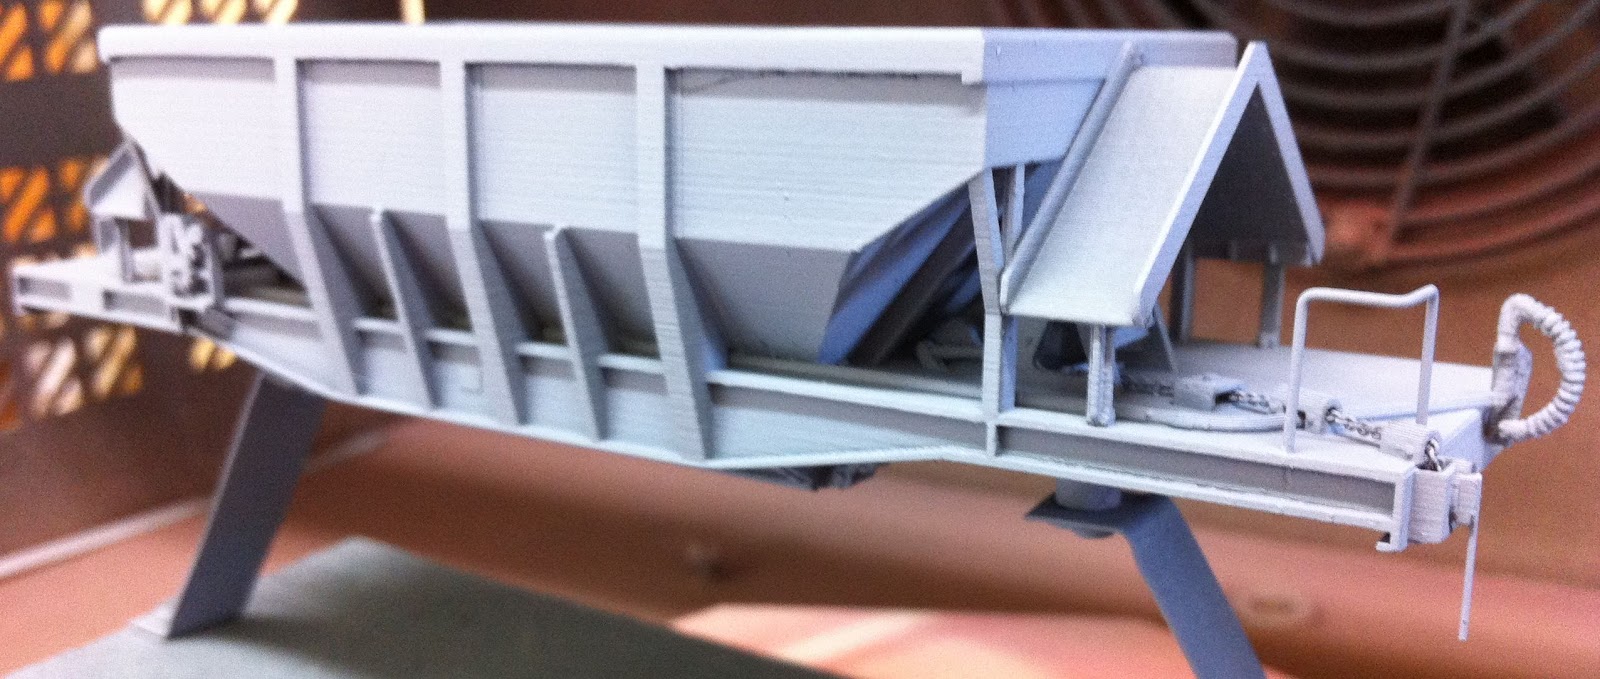
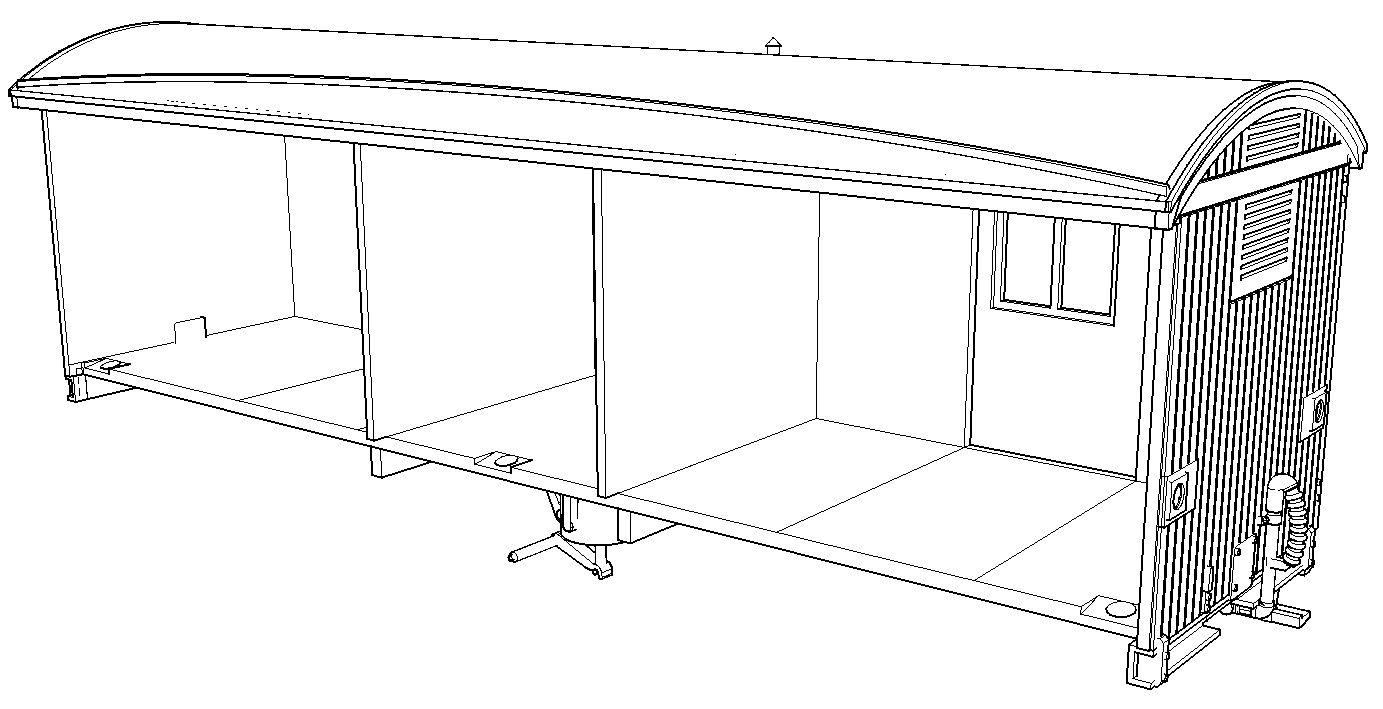
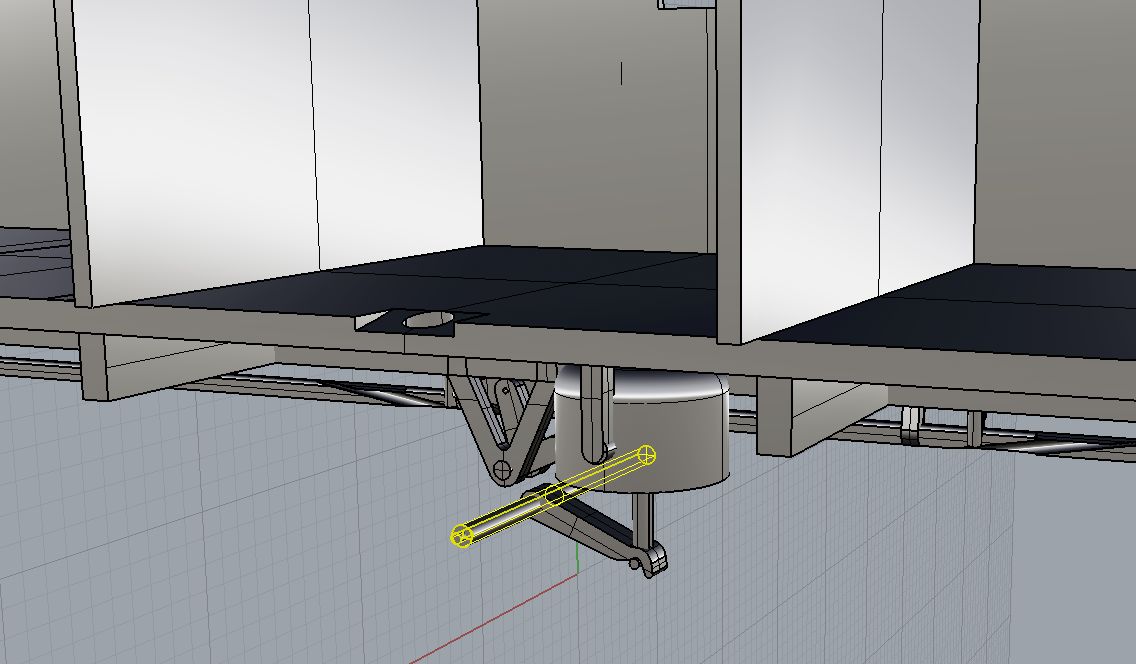
Monday 30 September 2013

CXB "pre-October 2013" Construction Tips

This page refers to the "original" CXB design available in limited numbers prior to October 2013.  For CXB's produced from October 2013 refer to the updated Construction Tips.

Removing Support Structures

Carefully remove the support structure from both parts of the wagon.  It is suggested to use a sharp knife  carefully cut the supports away from the roof, ends, and the underframe.  Take particular care around the brake handle, brake hoses, W-irons, brake shoes and remainder of brake rigging, and the shunters steps.

Because of the fine ribbing on the brake hoses, the 3D printer's automatic software has generated many support points, which have merged into one.  Carefully cut between the brake hose and the support structure, using repeated cuts with a sharp knife (e.g. Olfa snap-off blade type), to separate the support structure, then carefully trim the remnants from the hose.

Interlocking Parts
Note that on the underside of the roof, alternating ribs extend a short distance beyond the edge of the roof to interlock the two parts when it is time for final assembly.  Also note that on the middle floor of the smaller part, the floor ribs extend a short distance to interlock with the other part.

The support structure extends inside the upper and lower decks of the wagon to support the inside of the wagon sides.  From the outside, cut through supports attached to the underside of the roof, and the underside of the middle floor.  When you have cut as many of these supports as possible from the outside of the wagon, gently wiggling the supports structure (e.g. with needle nose pliers) from the open side, will break the remaining supports and allow pieces of the structure to be torn away. Be careful not to apply excessive force to avoid damaging the side planks and door areas.

Once the majority of the support structure has been removed, carefully go over both parts and cut away the small supports which typically extend from one part to another, for example, around the brake rigging and between the frame members of the underframe.  An Exacto type hobby knife with a sharp pointed blade (Exacto #11 or similar) is quite useful for getting into the nooks and crannies.

Go around the surfaces of each part where they will join together, and smooth off any remnants of the fine supports, on the roof, ends, middle and lower floors, etc.  A sanding stick or small file can be useful for this, but be careful not to damage the projecting parts which are designed to interlock.  Also remove any remnants from the very ends of the projecting parts.  When you think you have finished, test fit the two halves together.  Interlock the roof ribs first, then gently bring the underside of the wagon together to see how it fits.  As well as the interlocking projections at the middle floor level, there are four frame members in the underframe which have retangular pins which fit into oval holes in their opposite number (a variation on the square peg in the round hole concept).  There are also two similar but smaller interlocking pins as part of the W-iron assembly at the end opposite the brake handle.

If the two halves don't close completely, dismantle again and check for and remove any tiny bumps from the support structure attachments.

Tapping Holes
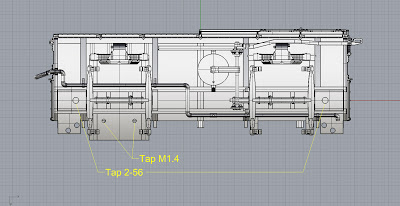

Holes to be tapped - Left Side
Tap the coupler mounting holes 2-56 (or 8BA).  As printed, the holes are 1.8 mm dia.  As you tap the holes, sight through the gap between the lower double floor layers and stop when the end of the tap hits the upper floor.

Tap the two holes in the W-iron assembly at the end opposite the brake handle with a M1.4 tap.  These holes will secure the other half of the W-iron assembly after the wheelset has been inserted.
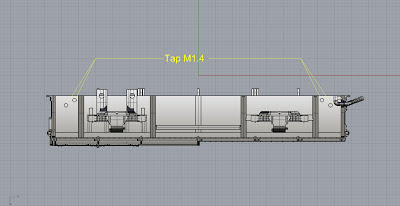
Holes to be tapped - Right Side
On the smaller right "half" of the wagon, identify the two 1.1 mm dia. holes near each end which are intended holding the halves of the wagon together.  Two holes are provided at each end, but only one need be used, the other is a "spare" in case of a stripped thread, or similar catastrophe.

Note:  Tapping the holes is preferable to using self-tapping screws which may fracture the material.  Although fairly robust, the material is more brittle than styrene or polyurethane.  

Bearings and Wheelsets

Gently clear out the bearing holes with a 2 mm drill bit in a pin vice, and also make sure there are no remants of supports in the recess around the bearing hole, otherwise the bearing may not go in all the way.

Press the bearings into the bearing hole, resting the axlebox on a small block of wood or similar to take the pressure to avoid bending the W-irons.

Insert one end of each axle into the bearing hole on the half with the brake shoes, and gently press the wheels into position, where they will be retained by the brake shoes pending final body assembly.

Body Assembly

As per the earlier test fit, interlock the roof sections first and gently close the gap at the underside of the wagon.  Align the free ends of the axles with the bearings, which should allow the body halves to close together.

Insert M1.4 x 3 mm screws into the fixing holes at each end, to secure the two body halves together. Gently squeeze the sides of the wagon together to get a tight fit as you tighten the screws.

Insert 2 x M1.4 x 3 mm screws into the fixing holes in the W-iron assembly.  

Check that the wheels roll freely without rubbing.  Rubbing may occur if there are any tiny remnants of support attachments, particularly in the inside surfaces of the brake blocks.

In the long term, you have the option of gluing the body together, e.g. with superglue, or continuing to use the screw fixings.  A half-way option is to just glue the roof area together, which would allow the join in the roof to be smoothed off, but would probably allow the underframe to be separated enough to change wheelsets, should that be necessary in the future.

Compensation Option

The W-iron assembly at the end opposite the brake handle, has a hidden "living hinge" which allows it to rock from side to side, to accommodate slightly uneven track.  As supplied, the W-iron assembly is secured at each end to the inside of the solebars via four cylindrical connections.  Cutting these connections, allows the W-iron assembly to rock and provide the compensation feature.
Cylindrical connections to be cut for compensation (4 each side)
It is up to the modeller whether they wish to retain the rigid underframe, as supplied, or cut the cylindrical connections to enable the compensation.  However, the change to compensation is not reversible, other than by inserting pieces of styrene, or similar, 1mm thick between the the W-iron assembly and the underside of the floor.

Adding Wire Detailing

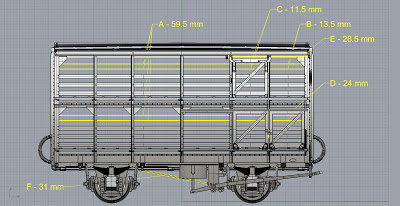
Several lengths of 0.4 mm brass wire are required as follows:
  • A - 59.5 mm, above timber side rails, 4 pieces per side
  • B - 13.5 mm, above timber side rails, upper deck only, 2 pieces per side
  • C - 12 mm, upper doors, 2 pieces per side
  • D - 24 mm, lower doors, 2 pieces per side
  • E - 28.5 mm, upper door top guide, 1 piece per side
  • F - 31 mm not including 90 degree bend on one end, brake pull rod, 1 piece per wagon
The holes for the above have all been incorporated in the 3D-printed model, with a nominal diameter of 0.6 mm.  If a wire does not go in easily, do not force it.  Clean out the hole(s) with a 0.45 mm or 0.5 mm drill bit in a pin vice.

Also using 0.4 mm wire, form the handrails which are located vertically on the ends of the wagon, above the brake lever and shunter's step.  The spacing between the holes is 6.5 mm.

Weighting

With no additional weight, the completed wagon including wheels and couplers weighs around 38 grams.  The "desirable" weight for a 4-wheel wagon is around 65-70 grams to ensure optimum operation including operation of Kadee couplers.

Addition of a Marbelup Models sheep load in Aluminide material adds approximately 24 grams, bringing the total weight up to around 62 grams.

If modelling an empty wagon, the weight can be increased by gluing lead shot or sheet lead between the various frame members of the underframe, where it would not be seen in normal operation.  It would also be possible to slide thin metal (less than 1 mm thick) between the double floor layers, although this would preclude the view of "daylight" between the double floors.

Painting

Either enamel or acrylic hobby paints can be used to paint the finished model.  

If desired, the interior of the wagon can be painted (airbrushed) prior to assembly.  Experience to date suggests that this is probably not necessary as overspray from painting the outside tends to take away the "bare plastic" look on the inside surfaces.  

Obviously, if a sheep load is to be included, it should be added after spray painting the wagon itself. Tamiya XF-78 Wooden Deck Tan is a reasonable colour for the sheep load.

Once the wagon is completely assembled, the join line on the roof can be filled and smoothed off. The join lines on the ends are virtually invisible as they are aligned with the angle iron end braces.


Sunday 15 September 2013

VG Bogie Covered Van

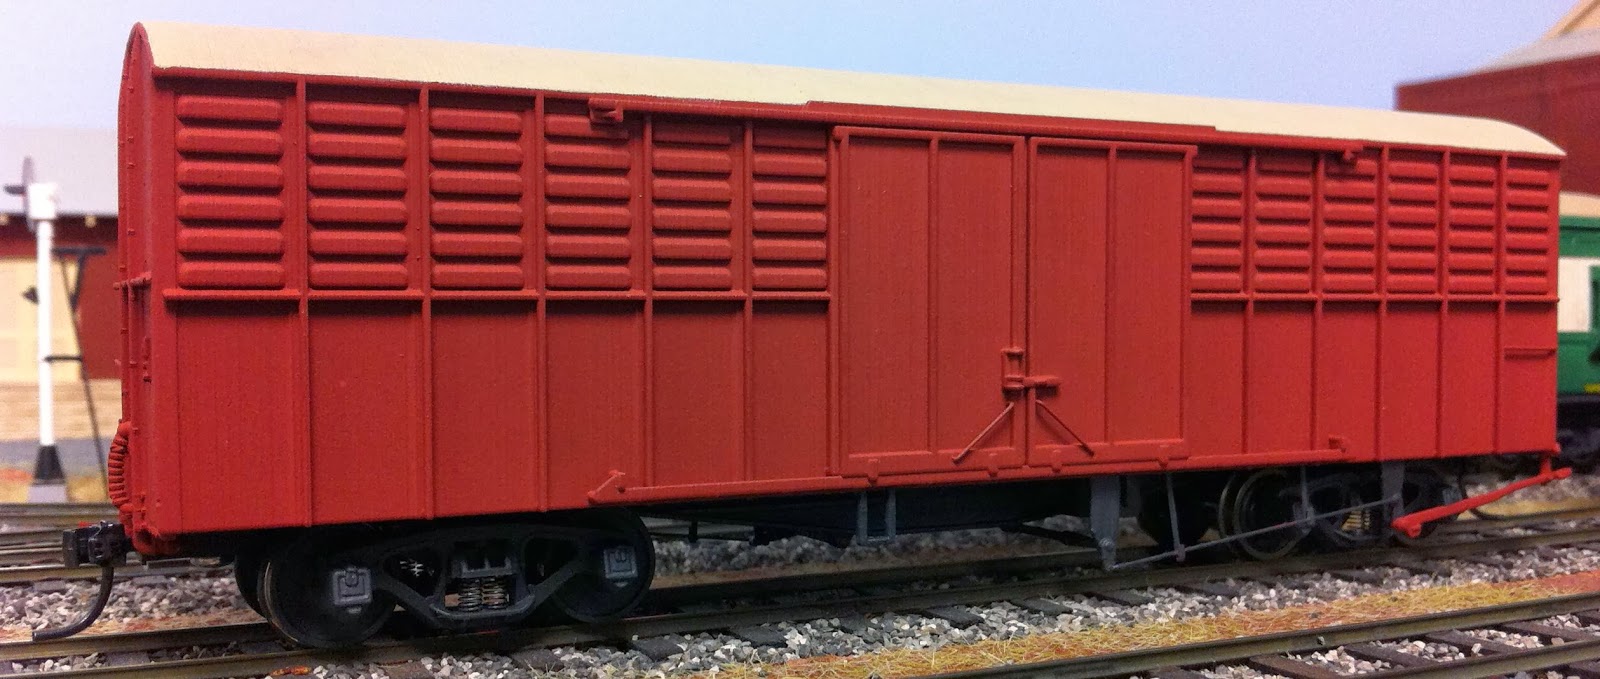
Marbelup Models VG after detailing and painting
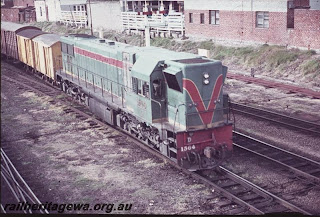
The VG Bogie Covered Vans were introduced in 1969 and initially ran in red/brown livery before being painted in Westrail yellow.  The photos below, from Rail Heritage WA, shows VG's at Albany and Perth in red/brown livery.

VG (on left) at Albany circa 1971
VG on train approaching Perth Station
Refer to the WAGR Wagon Pages for more information on the prototype.

The body of the VG has been printed in one piece, and includes all details except handrails and two brake pull rods, which have to be added by the modeller using brass wire.  For more information, please refer to the Construction Tips.

Photo of first test print (Please excuse mismatched bogies.)

Railwest Models sells suitable bogies for the VG.  The bogies shown in the photo are by American Models which are for standard gauge, but suitable for regauging to Sn3½  Marbelup Models sells 3D-printed bolsters which greatly simplify the regauging process.

Tuesday 10 September 2013

WAGR WMC Iron Ore Wagon


The WMC wagons for built for and privately owned by Western Mining Corporation (WMC) in the mid 1960's to carry iron ore from the Koolanooka Hills mine near Morawa to Geraldton.  Later the wagons were used for carriage of coal, talc and grain, and were modified by the addition of hungry boards (WMD) or covered roof (WME)  Refer to the WAGR Wagon Pages for more information on the prototype.

The model represents the original WMC design, as used for iron ore traffic, but the WMD version (with hungry boards) is also available.

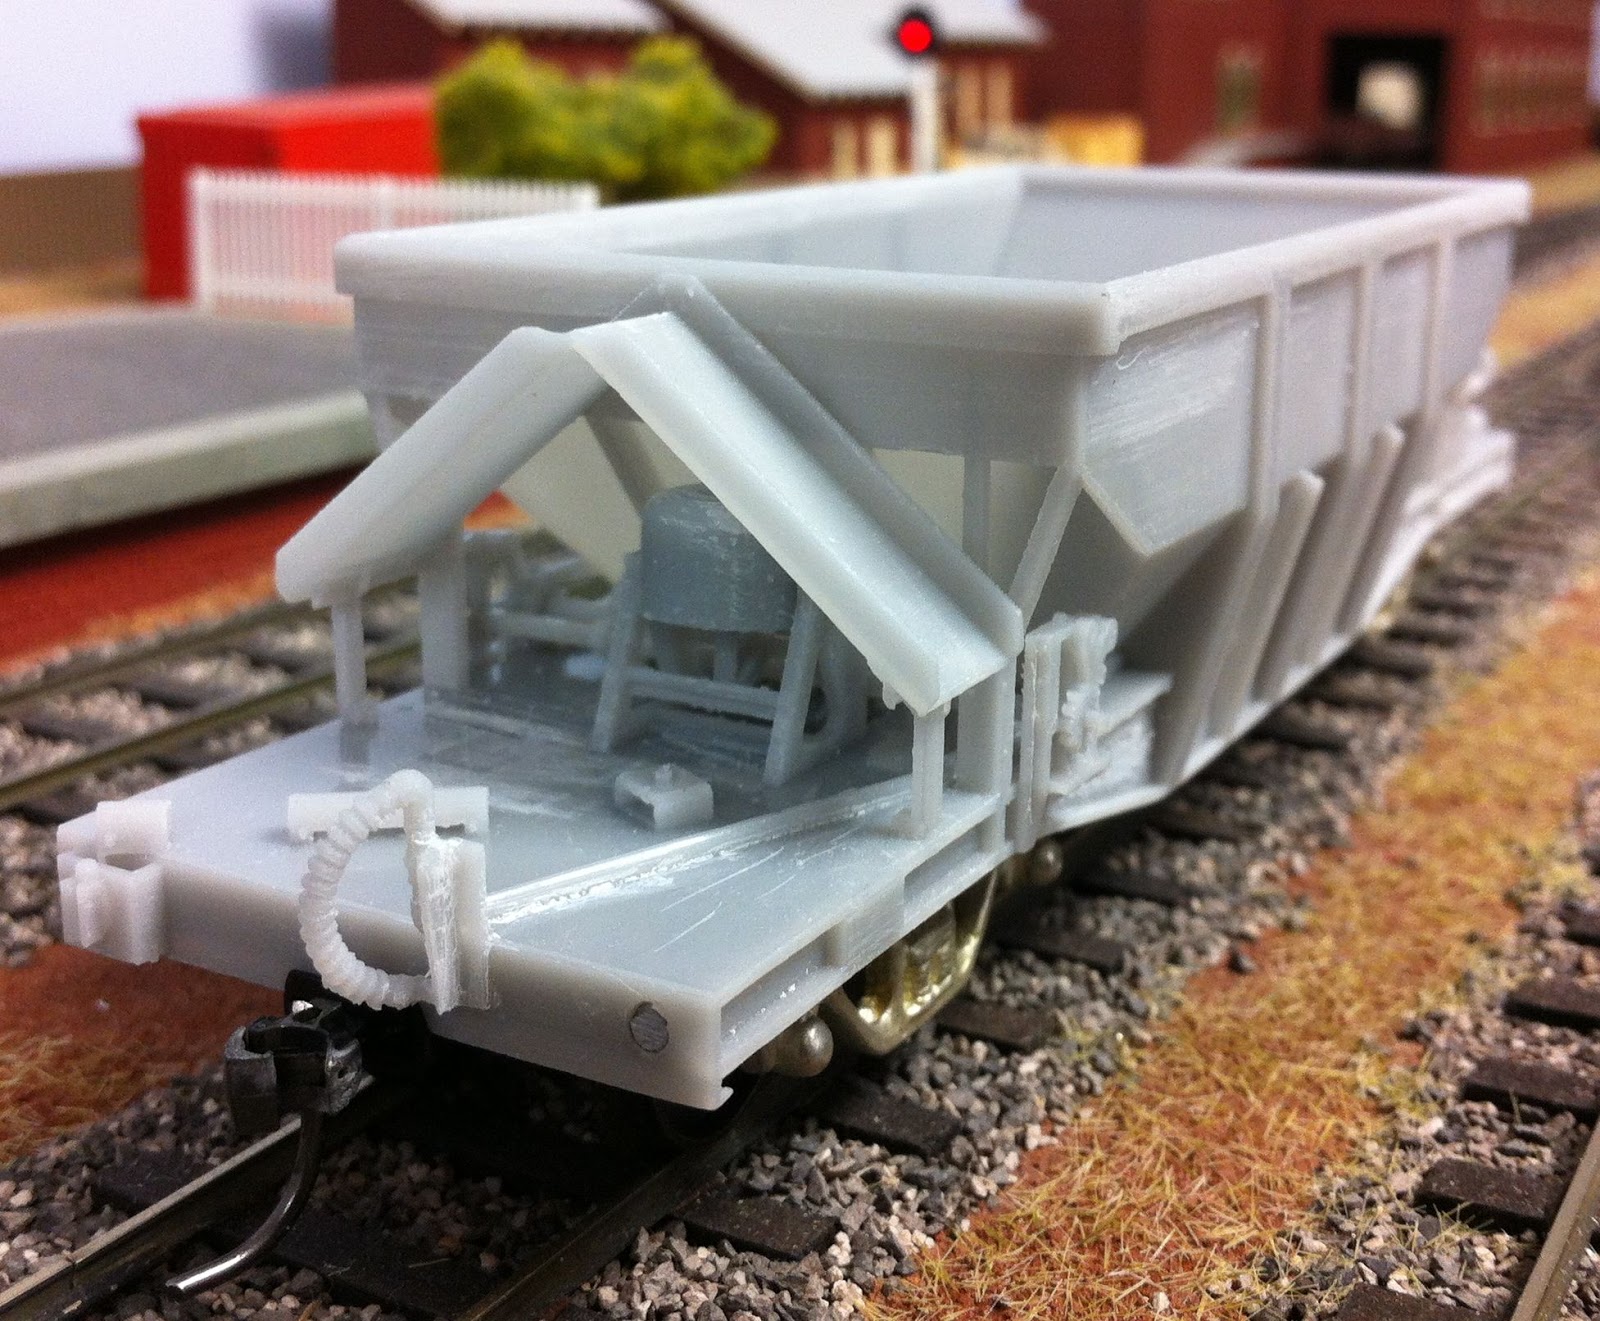
These photos are of the first test print from i.Materialise.  The bogies fitted to the test model are QR bogies in Sn3½ by Black Diamond Models in Qld.  They are roller bearing style, but slightly different shape to the WAGR bogies fitted to the real WMC's.  They are the correct wheelbase (5' 6").  Marbelup Models has since produced the correct WAGR roller bearing bogies as 3D-printed parts.


Most details are included in the 1-piece 3D-printed body including:
  • Vacuum cylinders at both ends
  • Brake hoses and piping
  • Simulated gear and chain drive for the bottom dump doors
  • Shunters' steps (not present on test model)
Detail to be added by the modeller includes:
  • Two brass wire "shafts" as part of door operating mechanism
  • L-shaped handrails at both ends (brass wire)
  • Handle for handbrake at both ends (brass wire)
  • Chain from handbrake to brake cylinder, at both ends.
For more information, please refer to the construction tips for the WMC and WMD.

End view showing vacuum cylinder and brake hose.
Freshly painted in the spray booth, with handrails and brake chains added.
3D rendering of 3D-printed.


Wednesday 4 September 2013

WAGR ZBA Guard's Van

WAGR ZBA Guard's Van


The five ZBA Guard's Vans were converted in the 1950's from BA horse boxes, and were in service until the 1970's.  See the WAGR Wagon Pages for more information on the prototype.

The picture above shows the first test print of this model received from i.Materialise, painted, and with the addition of bogies, couplers, and wire truss rods.  Handrails are yet to be added.

This model is "representative" and is not intended to be "100% accurate", as there were detail variations between the 5 members of the class.  There is limited information surviving in terms of drawings and photographs, so is virutally impossible to determine which variations applied to any particular van.  The overall dimensions are based on outline drawings of the ZBA and BA.

Please refer to our Contruction Tips for details of bogies, couplers, etc. required to complete the model.

Tuesday 3 September 2013

ZBA Guard's Van Construction Tips

ZBA Main Body Section
The ZBA brake van is printed in two sections.  The main section consists of one side, the roof, ends, and floor.  The other section consists of the other side, including the running boards for that side.

ZBA Flat Side Section

Removing Support Structures

Carefully remove the support structure from both parts of the guard's van.  It is suggested to use a sharp knife  carefully cut the supports away from the roof, ends, and the underframe.  Take particular care around the running boards, brake hoses, the brake gear underneath the floor, and the dividing bars between the double windows.

Be very careful removing the support structures from the open side of the main body section.  Close to the centre, there is a projecting brake shaft, pictured below.  To avoid damaging the brake shaft, it is suggested to remove the supports from around it first.

Brake Shaft
There will be a support on the very end of the brake shaft.  Try to leave approximately 0.5 mm of the narrowed section where the supports is attached to the brake shaft, as this forms a pin which interlocks with a hole in the side section to support the free end of the brake shaft.
Brake Shaft Pin Detail
Because of the ribbing on the brake hoses, the 3D printer's automatic software has generated many support points, which may have merged into one.  Carefully cut between the brake hose and the support structure, using repeated cuts with a sharp knife (e.g. Olfa snap-off blade type), to separate the support structure, then carefully trim the remnants from the hose.

Once the majority of the support structure has been removed, carefully go over both parts and cut away the small supports which typically extend from one part to another, for example, around the brake rigging.  An Exacto type hobby knife with a sharp pointed blade (Exacto #11 or similar) is quite useful for getting into the nooks and crannies.

Go over the model and smooth off any remnants of the fine supports, especially on the edge of the roof on the open side of the main body section.  A sanding stick or small file can be useful for this

When finished, test fit the two halves together.  Interlock the tabs on the top of the flat side under the roof of the main section, then gently move the flat side into position to see how it fits.   There are three tabs on the bottom of the flat side which should end up on top of the floor surface, inside the main part of the van.

Tapping Holes


The mounting holes for the couplers and bogies should be tapped 2-56 (or 8BA).  As printed, the holes are 1.8 mm dia.  Clear out the holes with a 1.8 mm drill in a pin vice, and drill through the floor as well to faciliate tapping.

If desired, the holes in the three tabs on the inside of the flat wall section can be tapped to all the side wall to be fixed in place with screws, rather than glue, to allow for future access to the inside.

Note:  Tapping the holes is preferable to using self-tapping screws which may fracture the material.  Although fairly robust, the material is more brittle than styrene or polyurethane.  

Bogies


The spigots on the underframe are designed to suit Walthers bogies Part No. 933-1077.  Other types of bogies can be fitted by cutting away the spigots as required, and building up a mounting platform at the required height from styrene sheet.  If using different bogies, ensure that the mounting height is adjusted so that the coupler mounting surface is 11.5 mm above rail level.

If using the Walthers bogies, the bogies should be dismantled to allow fitting of 12 mm diameter spoked wheels (26 mm axle length).  With care, the brake shoes at the ends of the bogie sideframes can be bent out to provide clearance for the 12 mm wheels.  The bogies are supplied with spare bolsters which have a high mounting boss, and these spare bolsters should be used when reassembling the bogies.

When fitted with the Walthers bogies, the ZBA will negotiate curves down to 600 mm radius.

Couplers


The ZBA is designed for Kadee "whisker" couplers.  Either the #158 (scale size) or #148 (normal size) couplers can be used, with #262 draft gear boxes.

The draft gear boxes supplied with the couplers do not fit as they have a different mounting hole position.  The #262 draft gear boxes are narrower and have been used because they allow details such as the brake hoses to be positioned the scale distance from the van centre line.  Also, the #262 draft gear boxes are easier to use as the lid snaps into position.

Note that the height from rail level to the coupler mounting surface should be 11.5 mm, the standard for Kadee couplers.


Truss Rods


The truss rods can be formed from 0.5 or 0.6 mm brass wire. From a length 94.5 mm long, form a 10° bend 30 mm in from each end, to leave a horizontal section 34.5 mm long.

There are grooves in the lower running boards and running board support brackets into which the truss rods can be glued.  Between the queen posts, the truss rods run on the underside of the lower running boards.  The small projections below the side sills represent the brackets which anchor the truss rod ends on the real guard's van, so the ends of the truss rods should finish in line with these brackets.

Optionally, the truss rods could be extended horizontally at each (e.g. by 5 mm) and glued onto the underside of the side sills for additional strength.

Truss Rod Location (rear view of Flat Side)

Handrails


Small starter holes have been provided to locate the various handrails.

The long handrails on each side can be cut from ?? mm brass wire.  Turned brass handrail knobs are available in various lengths, to allow for the thickness of the doors (1.5 mm), so that the handrails remain parallel to the sides.

The small handrails can be formed from 0.5 mm brass wire.  These include the diagonal handrails on each door, and the horizontal handrail on each door below the long handrail.


Weighting


With the recommended bogies, the completed van weighs around 82 grams.  The "desirable" weight for a van of that length (140 mm) is around 95 grams to ensure optimum operation including operation of Kadee couplers.  (See the Sn3½ blog for more information.)

Additional weight can be added by gluing lead shot or sheet lead between the various frame members of the underframe, where it would not be seen in normal operation, or gluing sheet lead on the floor inside the van.

Painting


Either enamel or acrylic hobby paints can be used to paint the finished model.